How to Fix a Broken Backpack Strap in the Field
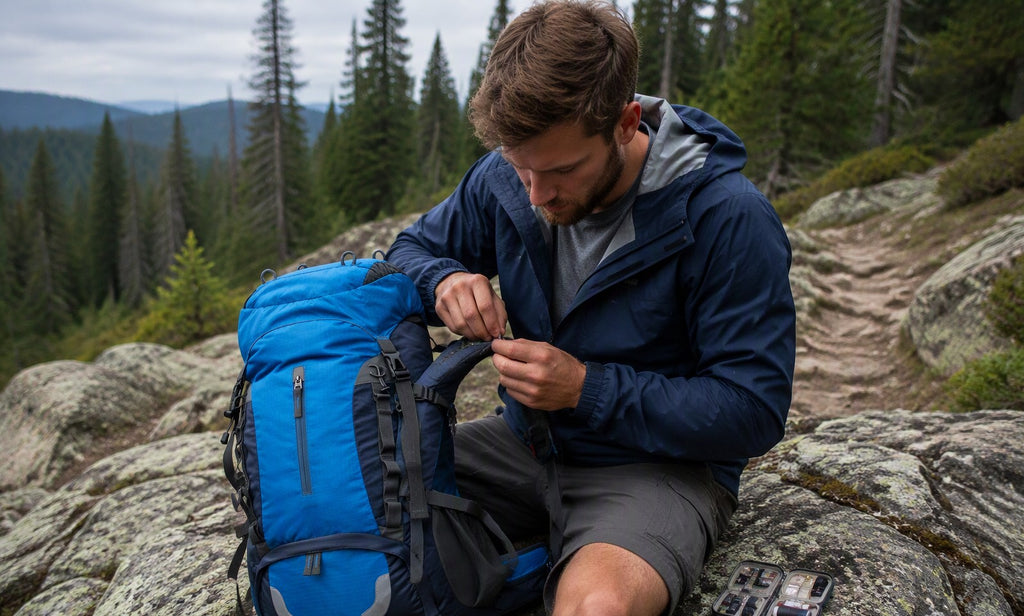
To fix a broken backpack strap in the field, use duct tape for temporary support, zip ties for buckle failures, or a heavy-duty needle and nylon thread for a secure stitch.
Why Strap Repair Matters
A failed strap shifts your entire load—often 25–35 lb—onto one shoulder, creating uneven pressure that leads to fatigue, chafing, and potential injury. When you know how to fix a broken backpack strap in the field correctly, you can save your trip and your gear. Most trail damage is manageable in minutes with a basic kit, and proactive repair keeps a functional pack out of the landfill. I'm Vivian, a product manager at Finvizo and a weekend camper, and I learned this the hard way when a shoulder strap let go six miles into a hike last fall—a little preparation goes a long way in preventing a minor tear from becoming a total equipment failure.

What You'll Need
Keep a field repair kit weighing under 4 oz in a hip-belt pocket for quick access:
- Duct tape (3–4 ft wrapped around a lighter or trekking pole)
- Zip ties
- Heavy-duty nylon thread and a sturdy needle
- Safety pins
- A spare side-release buckle
- A multi-tool
Choose packs with easily accessible repair-kit pockets so you never have to unpack everything trailside. The 50L Ultralight Backpack features multiple external pockets, and its hip-belt pocket is spacious enough to hold a comprehensive kit.
Step-by-Step: Fixing the Strap
Diagnose the failure first—whether it is a tear, a broken buckle, or a detachment—then follow the appropriate path.
Step 1: Assess the Damage
Identify the failure: is it torn webbing, a cracked buckle, a slipping adjuster, or a full detachment? Check the anchor-point stitching closely, as hidden damage there often leads to repeat failures. Many of these issues start with over-tightened or misadjusted gear; our guide to adjust backpack straps for comfort provides a baseline for proper fit.
Step 2: Redistribute Your Load
Before starting the repair, move heavy items low and close to your spine. Shift the weight onto the hip belt and the intact strap. If you are hiking with a partner, hand off 5–10 lb of gear to them while you attempt the fix to reduce tension on the damaged area.
Step 3: Apply the Emergency Fix
For a torn strap, align the ends and wrap duct tape tightly in overlapping layers, extending at least 2 inches past the tear on both sides. Secure the wrap with safety pins. If the buckle is broken, thread a zip tie through the adjuster slot to lock the strap length, or clip both ends together with a carabiner.

Step 4: Reinforce with a Field Stitch
Double-thread heavy nylon and perform a backstitch along the tear, maintaining a 1/4-inch margin from the edge. For a reattached strap, use a box-stitch—a rectangle with an X inside—to ensure multiple thread lines spread the load. Knot off the thread twice; this process typically takes about 10 minutes.
Step 5: Test, Adjust, and Hike On
Perform a pull-test on the repair with both hands before putting the pack back on. Gradually load the pack, re-balance the straps, and check the repair at every rest stop. The 45L Hiking Backpack with Airflow Frame features bar-tacked anchors and a ventilated back panel, which makes rebalancing your load significantly easier after a field adjustment.

Pro Tips
- Wrap duct tape around your lighter or trekking-pole handle to save space.
- Carry a spare buckle that matches your strap width; 20, 25, and 38 mm sizes cover most standard packs.
- Heat-seal frayed webbing with a lighter—melt the edge slightly without burning it—to stop the unraveling.
- Dental floss is a great alternative to heavy-duty thread if you are in a pinch.
- Take a photo of your buckle threading pattern before disassembling it so you can re-thread it easily.
Mistakes to Avoid
- Do not treat duct tape as a permanent solution; adhesive loses strength under sweat and heat.
- Avoid stitching too close to the edge of the fabric, as the thread will pull through under tension.
- Never sew into already torn anchor fabric; the repair will likely rip out again immediately.
- Do not continue to hike with the pack on one shoulder, as this risks long-term back injury.
Maintenance Frequency Table
Two minutes of preventive checks can prevent most mid-trail failures:
| Task | Frequency | Why |
|---|---|---|
| Visual strap + buckle inspection | Before every trip | Catch fraying and cracks early |
| Tug-test strap anchor stitching | Monthly | Detect loosening threads |
| Check adjuster grip | Every 2–3 trips | Dirt causes slippage |
| Heat-seal new frayed edges | When visible | Stops unraveling spread |
| Deep clean + hardware check | End of season | Extends pack lifespan |
| Restock field repair kit | After every use | A kit only works if complete |
Replace vs Repair
Repair torn webbing, broken buckles, and slipping adjusters, as these parts are inexpensive to fix. You should consider replacing the pack when the anchor fabric tears through the body or if failures recur at the same point. On remote trails, an aging pack with recurring structural failures is a safety risk. When shopping for a new one, prioritize packs with reinforced, bar-tacked strap anchors.
FAQ
Can you fix a backpack strap with duct tape?
Yes. Wrap overlapping layers tightly, extending 2 inches past the tear on both sides. It is a temporary fix, so plan to sew or replace the hardware soon after your trip.
How do you fix a broken backpack buckle on the trail?
Lock the strap length with a zip tie through the adjuster slot, or use a carabiner to bridge the gap. A spare side-release buckle is the best long-term field fix.
What should be in a backpacking repair kit?
Include duct tape, zip ties, heavy-duty nylon thread, a needle, safety pins, a spare buckle, and a multi-tool. The total weight should remain under 4 oz.
When should you replace a backpack instead of repairing it?
Replace the pack when the fabric anchor points are torn through or if strap failures occur repeatedly at the same location.
Can you hike with a broken backpack strap?
Only for short distances. Shift your load low and close to the spine, and rely on your hip belt to carry the weight while you move carefully to your next stop.
Related reading
- Best Budget Travel Backpacks Under $100 (2026 Guide)
- Is a 50L Backpack Big Enough? Capacity Guide by Trip Length
- Hiking Backpack Size Guide

Vivian J is a Product Manager at Finvizo and an avid outdoor enthusiast. She tests gear on real trails and writes from hands-on field experience to help readers choose equipment that performs reliably outdoors.