camping gear correct assembly methods
Practical Correct Assembly Methods for Camping Gear
TL;DR: Correct assembly prevents the most common campsite failures — leaky tents, sagging sleep systems, and unstable kitchens. The field-tested rules: tension rainfly guylines from the corners outward and drive stakes at a 45-degree angle, let sleeping pads self-inflate for at least 5 minutes before adjusting, and keep cooking stations at least 15 feet from your tent with 12 inches of clear space around the flame.
Putting camping gear together the right way does not just make your campsite look neat and organized, it prevents unexpected failures that can turn a fun outdoor trip into a frustrating, uncomfortable mess. Many casual campers rush through assembly steps to save time, skip small critical details, and end up dealing with leaky tents, wobbly camp furniture, or broken cooking setups hours later when they are far from any backup supplies. These field-tested, step-by-step assembly methods are built for all common camping scenarios, from quick overnight car campouts to multi-day backcountry trips where every piece of gear has to hold up under rough, unpredictable conditions.
Tent Assembly That Avoids Common Leaks and Structural Failures
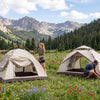
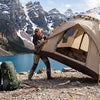
Start by laying out your tent footprint first, on the completely cleared, flat spot you picked out before setting up any other parts. Smooth out every wrinkle and fold in the footprint, so there are no bunched-up sections that will create uneven pressure points under the tent floor later. Lay the tent body directly on top of the footprint, line up all the corner grommets evenly, and do not stretch the fabric tight at this stage. A lot of new campers pull the tent body as tight as they can right away, which puts unnecessary stress on the seams and makes the fabric more likely to tear under strong wind.
Next, feed the tent poles through their designated sleeves or clip points one at a time, following the natural curve of the pole as you go. Never force a bent pole into place, and never twist the pole hard to make it fit a grommet, because this is the number one way to snap a carbon fiber or aluminum pole right in the middle of setup. Once all poles are seated properly, attach every clip to the pole segments in order, starting from the center of the tent and working your way out to the corners. This distributes tension evenly across the whole frame, so no single clip or pole joint takes on more stress than it was designed to handle.
After the tent body is fully framed, drape the rainfly over the top, and line up all the fly attachment points with the corresponding loops on the tent frame. Tension the rainfly guylines one at a time, starting with the four main corner lines, then moving on to the mid-panel guylines. Pull each line just tight enough to keep the rainfly from touching the inner tent fabric, which stops condensation from seeping through the mesh walls onto your sleeping bag overnight. Push every stake into the ground at a 45-degree angle, pointing away from the tent, so the stake locks into the soil and will not pull out even under strong, sustained gusts of wind.
Sleeping System Assembly for All Night Warmth and Comfort
Never skip the small prep steps for your sleeping setup, even if you are only planning to camp out for one single night. Start by unrolling your sleeping pad fully on the cleared, flat space inside your tent, and let it inflate completely on its own for at least 5 full minutes before you adjust the air pressure. Do not over-inflate the pad to the point where it feels rock hard, because fully rigid pads do not conform to your body shape, and they are far more likely to puncture if you accidentally set a sharp item down on top of them later. Let a little bit of air out slowly until the pad has a soft, slight give when you press down on it with your palm.
Lay your sleeping bag flat on top of the fully inflated pad, and unzip it all the way to spread it out evenly. Shake the bag from top to bottom a few times to fluff up all the insulating fill material, so there are no clumped or flattened spots that leave cold gaps against your body while you sleep. If you are using a separate insulated liner, slide it into the bag carefully, and smooth out all the wrinkles so the liner sits flush against the inner walls of the sleeping bag. This eliminates empty air pockets that would otherwise let body heat escape through the sides of the bag overnight.
Double check that the foot box of the sleeping bag is not pressed up tight against the inner tent wall. Even a small gap between the bag and the tent fabric stops moisture from seeping through the outer tent material and dampening the insulation, which would cut the bag’s warmth rating by more than half in cold conditions. Tuck any loose straps or drawstrings on the sleeping bag out of the way, so they do not get tangled around your legs while you climb in and out of the tent at night.
Camp Kitchen Assembly That Stays Stable and Safe
Pick a flat, level spot for your camp cooking setup that sits at least 15 feet away from your tent, all dry brush, and any hanging low tree branches. Clear the entire surface of all small rocks, loose dirt, and dry leaves that could catch fire or make your cooking surface wobble while you work. Set up your cooking platform first, and lock every leg into its fully extended, locked position before you set any pots or utensils down on top of it. Wiggle the whole setup side to side gently to confirm it does not shift or tip, because a wobbly cooking surface full of boiling water is one of the most common causes of preventable camp injuries.
Assemble your cooking unit on the far edge of the platform, away from the side where you will be reaching for utensils and food. Leave at least 12 inches of empty open space around all sides of the cooking unit, so there is no risk of loose fabric, paper towels, or food wrappers accidentally brushing up against the open flame. Connect the fuel line slowly, and double check that the connection is seated fully and tight before you turn on any fuel flow. Do a quick visual check for any leaks by brushing a small amount of soapy water on the joint, and confirm no bubbles form before you light the flame.
Set up your separate prep and eating area on a different section of the cooking platform, so raw food, dirty dishes, and utensils never sit close to the open flame. Hang your designated utensil line between two nearby trees, a few feet above the cooking surface, to keep all your spoons, spatulas, and cups off the ground and away from dirt and crawling insects. Before you start cooking, set your full bucket of water and a small fire extinguisher within arm’s reach, so you can put out any stray sparks or small flare ups immediately before they spread.
FAQ: Camping Gear Assembly
What is the correct angle for tent stakes?
Drive stakes into the ground at a 45-degree angle, pointing away from the tent. This locks the stake into the soil so it will not pull out even under strong, sustained gusts of wind.
How do you stop condensation inside a tent?
Tension the rainfly guylines one at a time, starting with the four corner lines, so the fly never touches the inner tent fabric. That gap stops condensation from seeping through the mesh walls onto your sleeping bag overnight.
How long should a self-inflating sleeping pad sit before adjusting?
Let it inflate completely on its own for at least 5 full minutes before you adjust the air pressure, and never inflate it rock hard — rigid pads do not conform to your body and puncture more easily.
How far should a camp kitchen be from a tent?
Set your cooking station at least 15 feet away from your tent, dry brush, and low branches, and leave at least 12 inches of open space on all sides of the flame.
How do you check a stove fuel connection for leaks?
Connect the fuel line slowly, confirm the joint is seated fully, then brush a small amount of soapy water on the connection. If no bubbles form, it is safe to light.